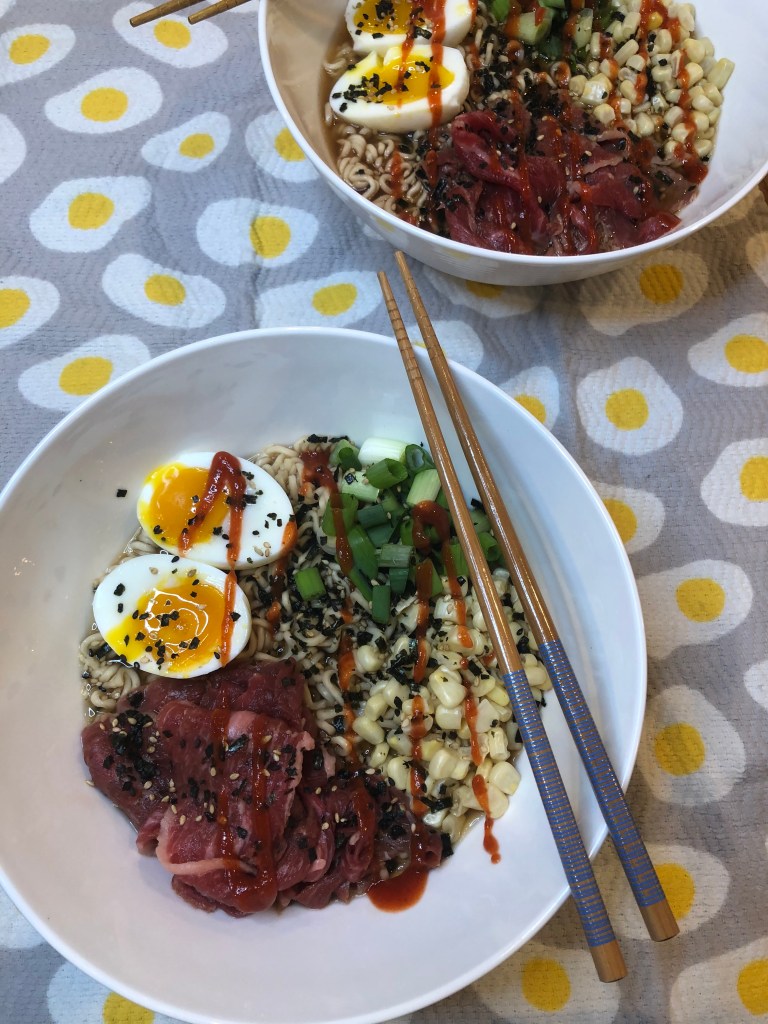
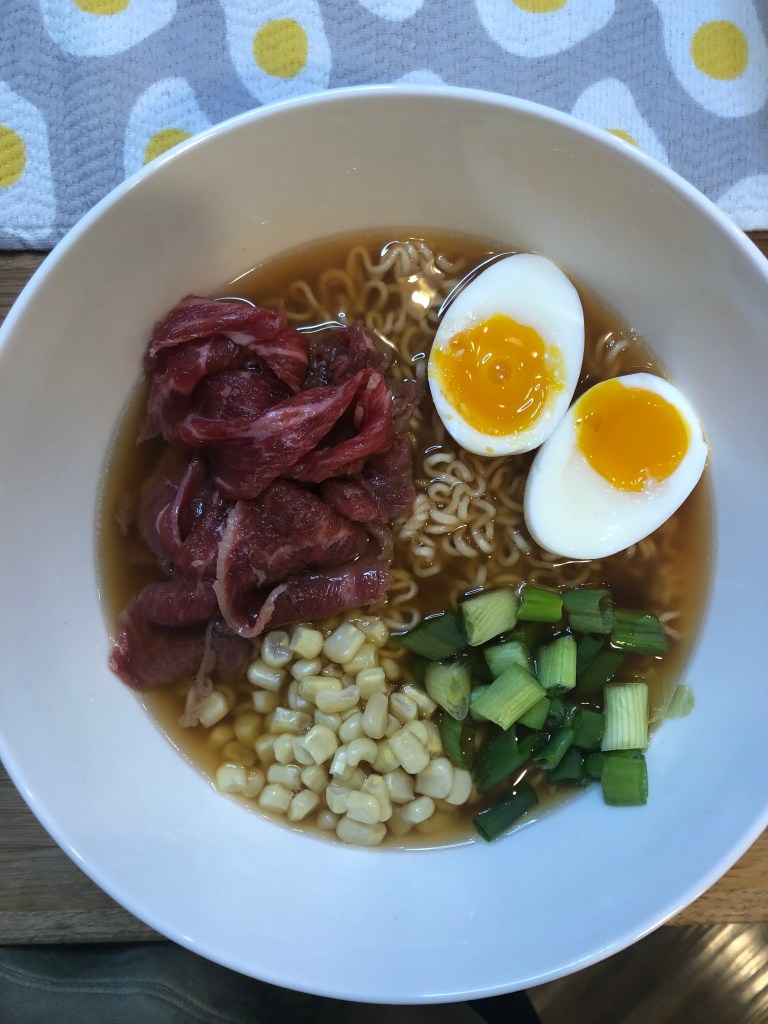
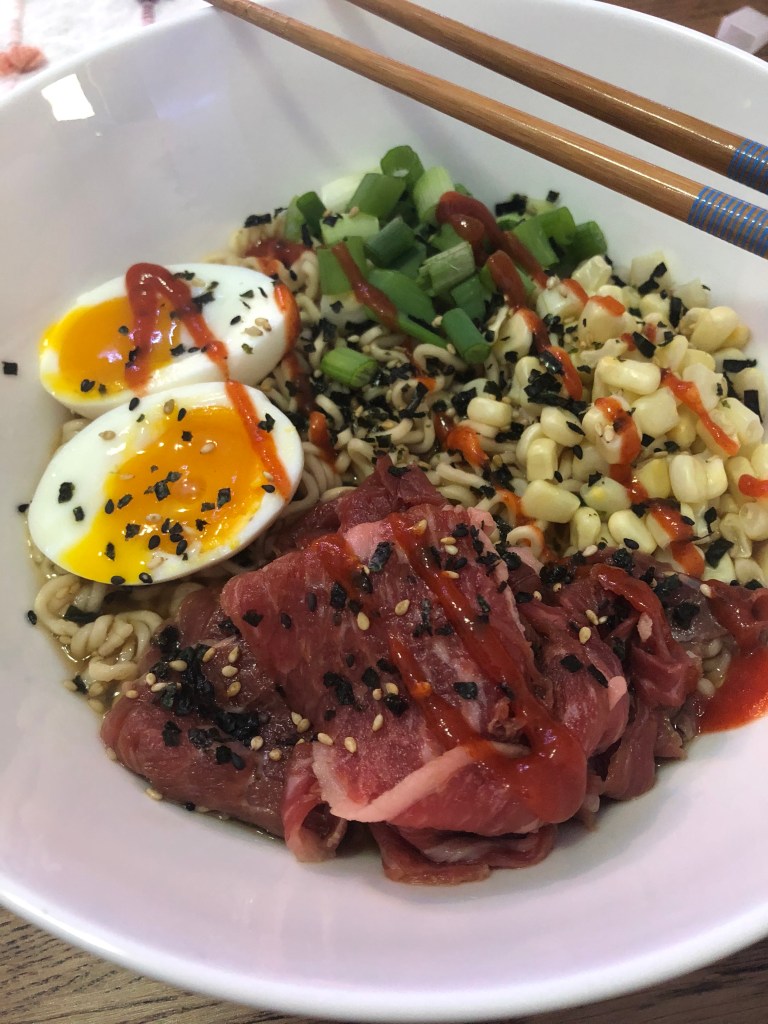
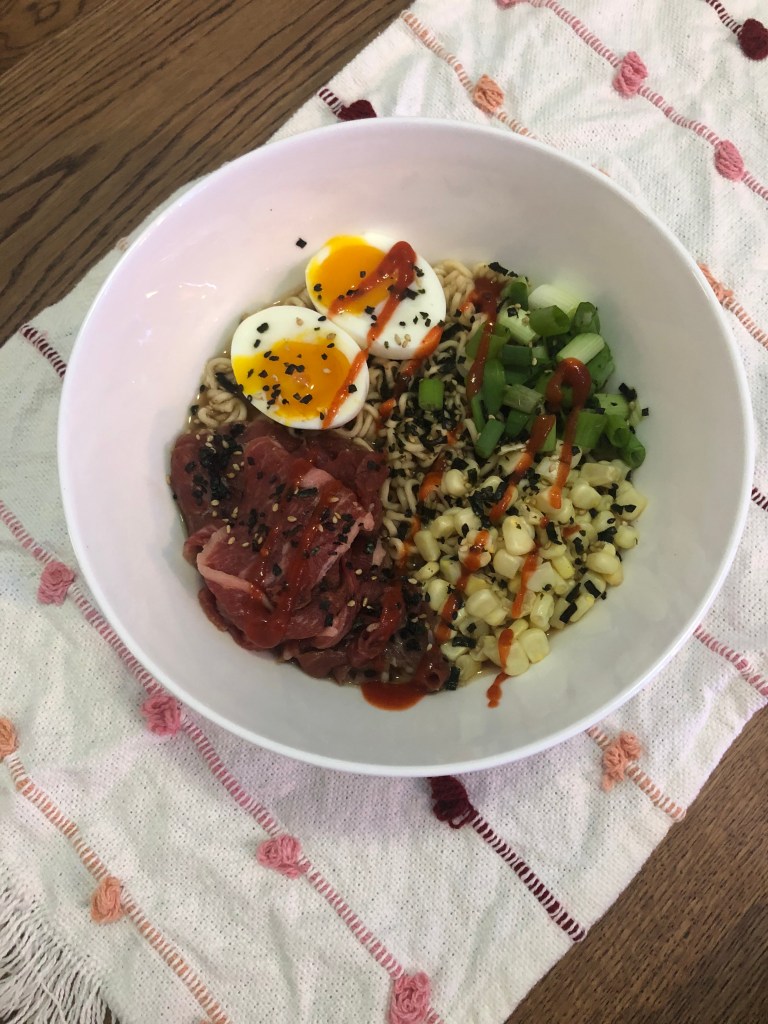
Ramen is super easy and cheap, but personally I do not find it a satisfying meal. I need more flavor in my life than instant ramen. My husband is the exact opposite, he could eat ramen plain and have no complaints. Recently with the cold weather, he has been eating so much ramen, we joke that he is going to turn in to it soon! I wanted to upgrade his ramen and make it a little fancier with a lot more flavor. I also hope to inspire all those college kids who religiously eat ramen so they can afford textbooks – been there, that shit ain’t cheap! You don’t need a lot of expensive ingredients to turn your boring ramen to a delicious meal that will keep you satisfied for longer. This can also easily be made in a dorm with a tea or coffee pot – you just need boiling hot water! For this upgraded ramen, I used thinly sliced beef for some extra fat and protein, soft boiled egg for even more protein and that jammy yolk, sweet white corn for some extra veggies and a hint of sweetness, green onions for a bite and crunch, sriracha for a kick, and furikake for a salty hit. Next time that ramen craving hits, try this if you have a little extra time! I promise, you will love it and see ramen in a whole new light!
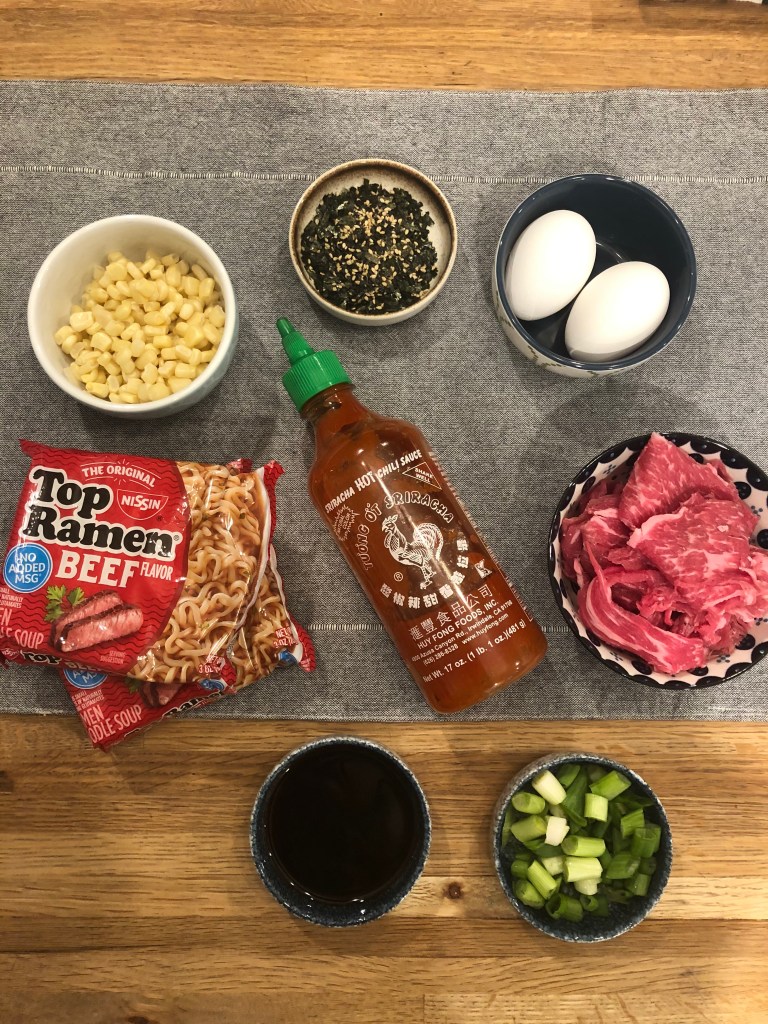
- 2 Packages Instant Ramen
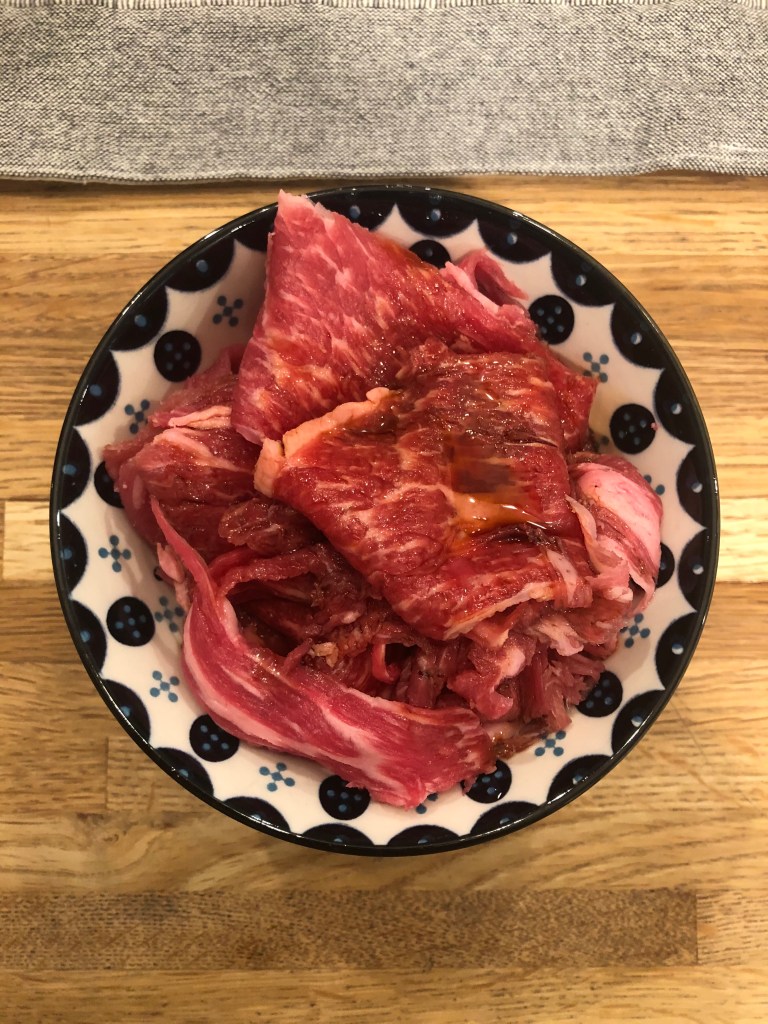
- 1/4lb Thinly Sliced Beef
- 1/4 Cup Soy Sauce
- 2 Tbsp Rice Vinegar
- 1/2 Cup Corn
- 2 Eggs
- 2 Green Onions, Chopped
- 2 Cups Water
- 2 Tbsp Furikake
- 2 Tbsp Sriracha
- Serves: 2
- Prep TIme: 10 Minutes
- Cook Time: 15 Minutes
- Total Time: 25 Minutes
To Make:
- Place the beef in a small bowl and add the soy sauce and rice vinegar to marinate. Set aside until ready to use.
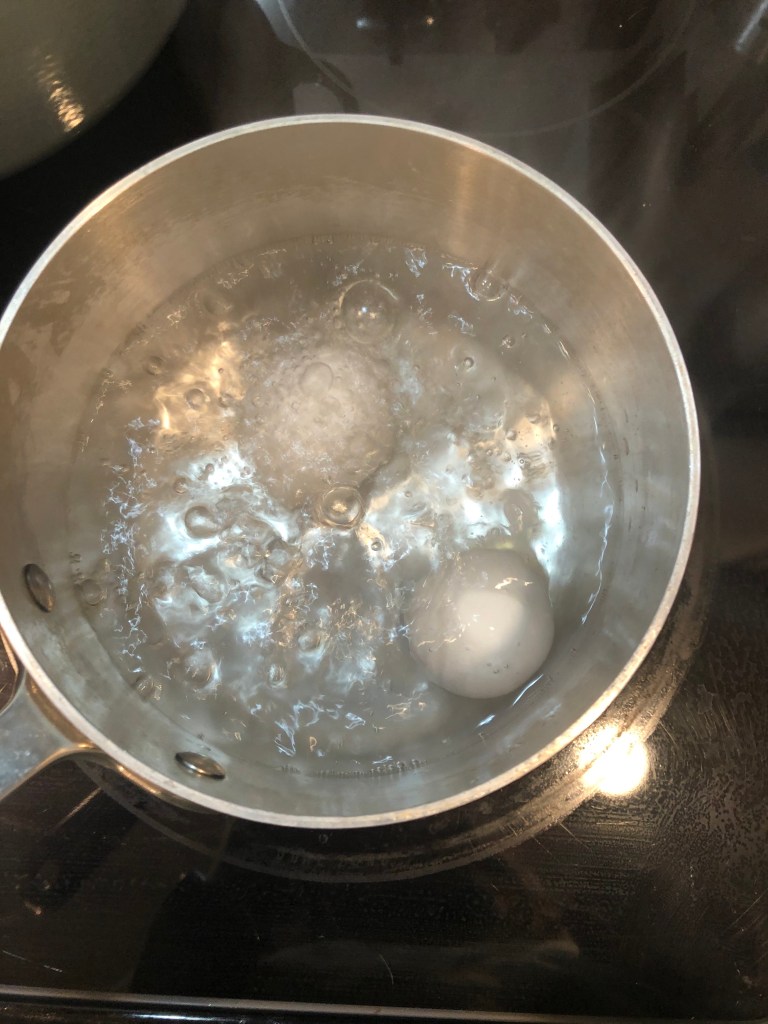
- Heat a small pot of water over high heat and bring to a boil.
- Once the water is boiling, add in the eggs and cook for 6 minutes. 6 minutes will achieve a soft boil, so the yolk will still be runny. For a firmer yolk, cook longer.
- Once the eggs are done cooking, remove from the boiling water and place under cold water to stop the egg from cooking further.
- Peel the shell off the egg and set the egg aside – you do not want to cut in to the egg until everything else is ready to go.
- While the eggs are cooking, heat 4 cups of water of high heat and bring to a boil. Add in the ramen packet seasoning and whisk to dissolve it. Bring the broth to a boil.
- Once the eggs are cooked and peeled and the broth is boiling, its time for assembly!
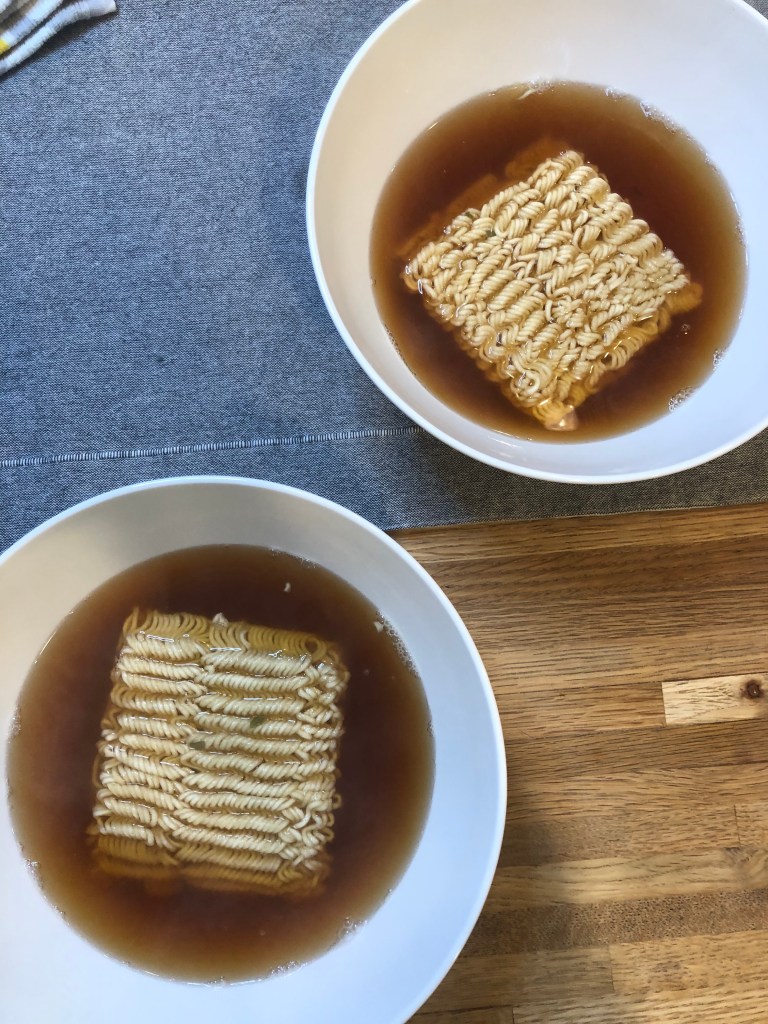
- Place the 1 packet of the ramen noodles in a large bowl.
- Pour in 1/2 of the broth (2 cups) to fully cover the noodles.
- Cover the bowl with a plate (or something to trap the heat in) and allow the noodles to cook for 3 minutes.
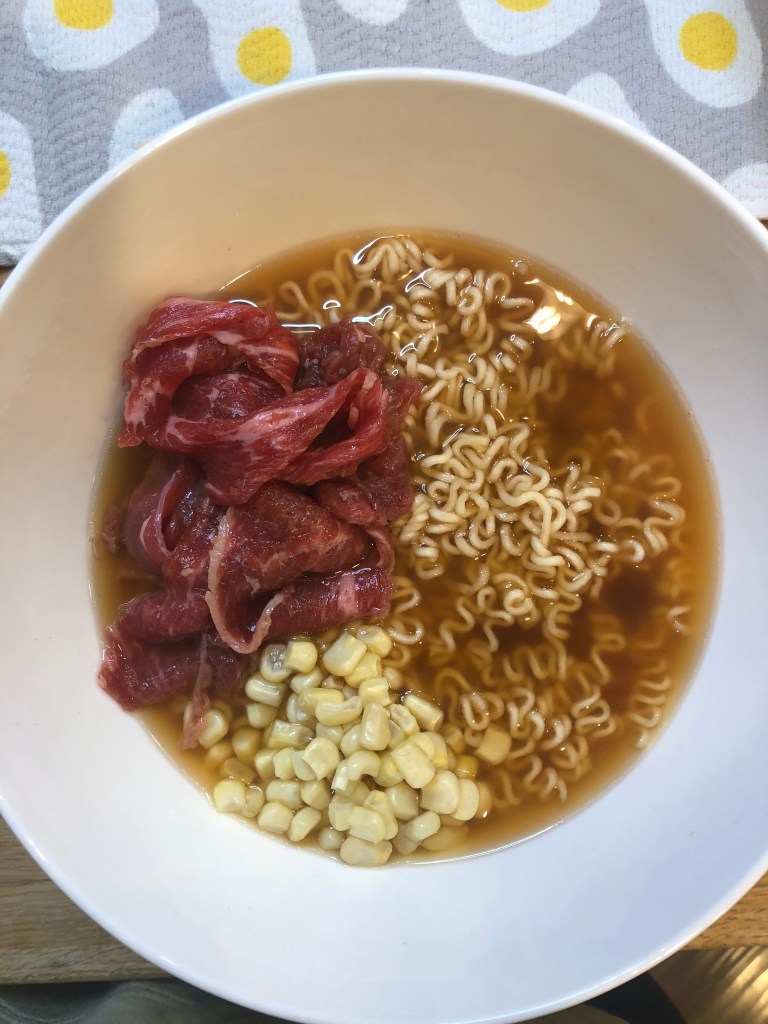
- Add in 1/2 of the marinated beef – the broth will still be hot enough to cook the meat, but if you are concerned, you can cook the beef in the broth before transferring it to the bowls).
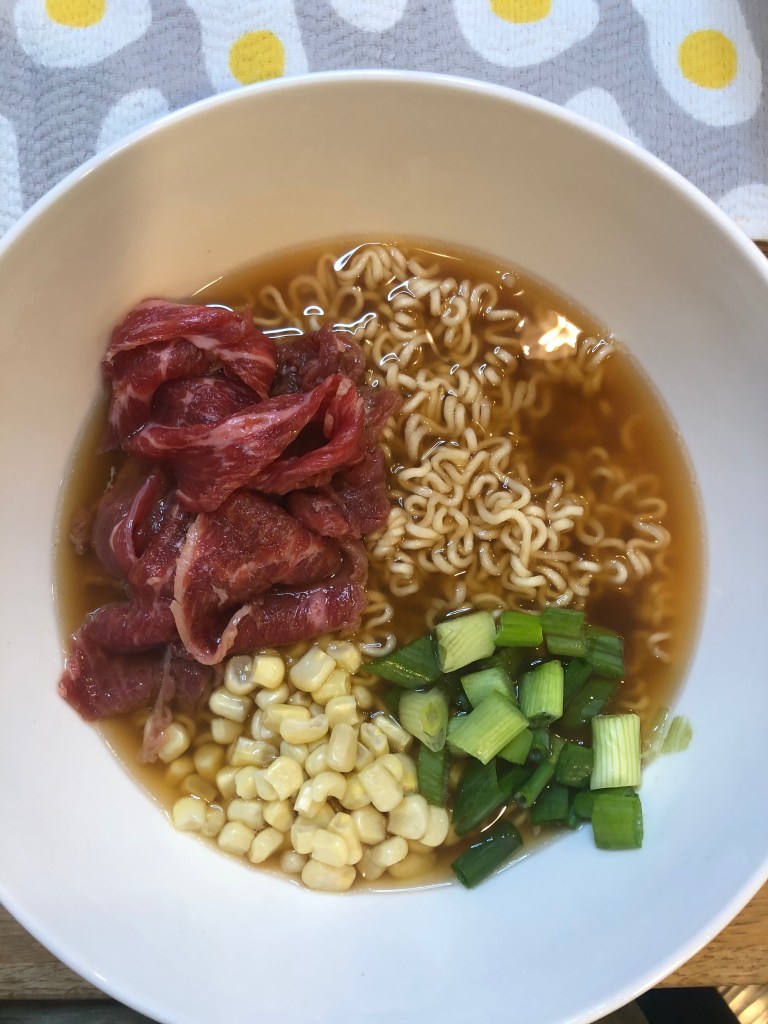
- Add 1 egg, green onions, furikake, and a drizzle of sriracha.
- Repeat steps 8-12 to make the second bowl.
- Serve and enjoy!
STEP 1
STEP 2/3
STEP 6

STEP 8/9
STEP 10
STEP 11
STEP 12
STEP 12


3 thoughts on “Upgraded Ramen”